



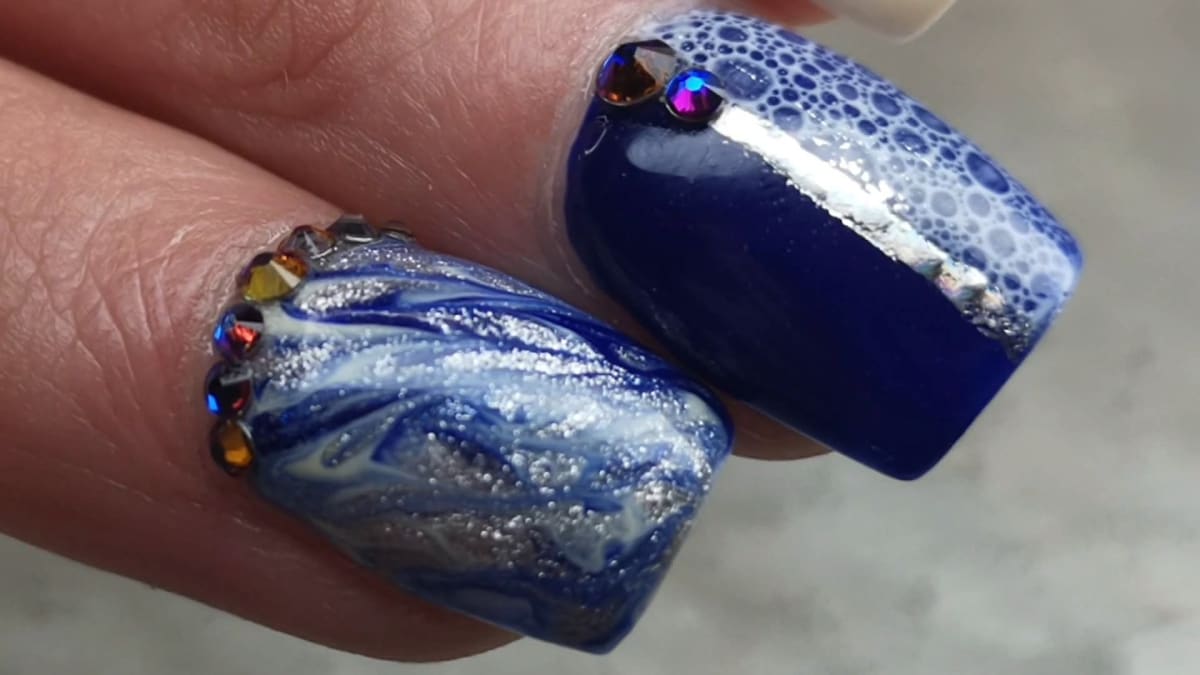
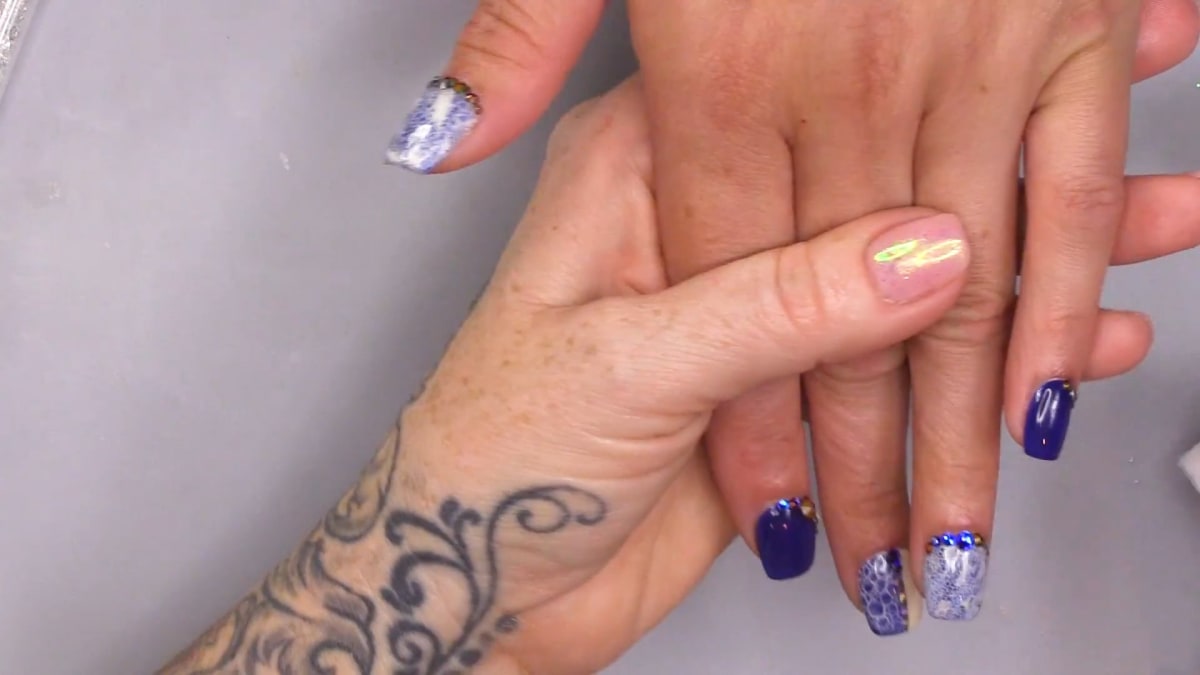
To make bubble nails, you paint a thinned white gel over a cured design, squeeze a soapy bubble mix onto it while it is still wet, cure for 60 seconds, then wipe the nail so the burst bubbles leave a coral-like texture. In this tutorial Kirsty shows the brand new technique on Annette's short nails.
It can be done on natural nails or extensions, over a marbled gel polish background.
The look uses navy, silver and Barley Fields, marbled with Blooming Gel, then covered with the bubble mix and finished with a foil line and a few stones. Below you'll find the products, each step with its place in the video, and Kirsty's tips.
At a Glance
- Design: coral-like bubble texture over a navy, silver and gold-toned marble
- Artist: Kirsty, with Annette as model
- Technique: bubble technique in gel polish over a Blooming Gel marble
- Nail length: short
- Key products: Ocean Ridge, Tarnished Silver, Barley Fields, Snow White, Urban Graffiti Blooming Gel, Urban Graffiti Top Coat, Nail Transfer Foil NF-009
- Video length: about 23 minutes
Why You'll Love These Bubble Nails
- A coral-like bubble effect that looks like magic
- Marbled navy, silver and gold-toned background
- Works on short natural nails
- Foil line and a few stones add finishing touches
Products Used in This Video


How to Create Bubble Nails
1. Prepare the nails
Buff off the top coat from the Builder in a Bottle nails to prepare for the gel polish design. This works on natural nails or extensions. Watch this step at 1:30
2. Apply the colours
Apply two coats of the navy, getting close to the cuticle without flooding it. Apply two coats of Barley Fields on the other nails. Watch this step at 4:00
3. Marble with Blooming Gel
Apply a thin coat of Blooming Gel, then dot on random navy, Barley Fields and Tarnished Silver and marble them with a clean brush. Keep the Blooming Gel thin or the nail will become bulky. Cure. Watch this step at 6:00
4. Add a border
Use Ocean Ridge around the edge, two coats, and cure. Watch this step at 14:40
5. Make the bubble mix
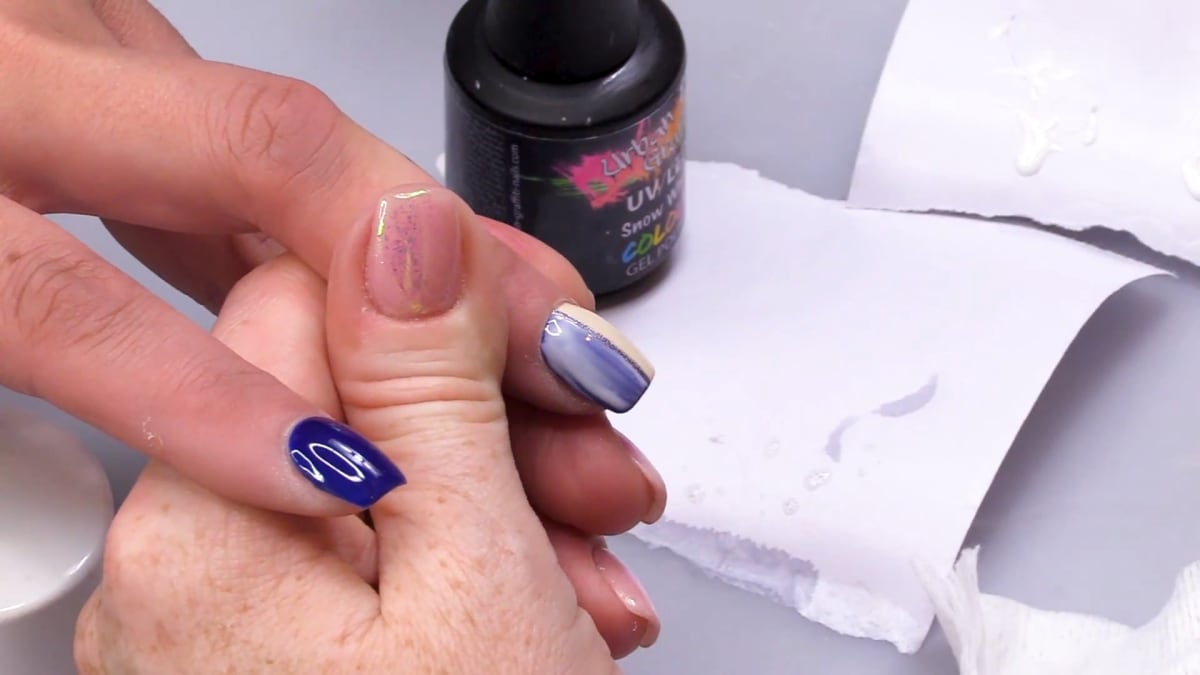
Mix a little Snow White with top coat, to give a white with some transparency. In a bottle, mix Gel Residue Wipe Off Solution, water and washing up liquid. The washing up liquid creates the bubbles, and the wipe off solution helps push the gel into shape.
6. Apply the bubbles
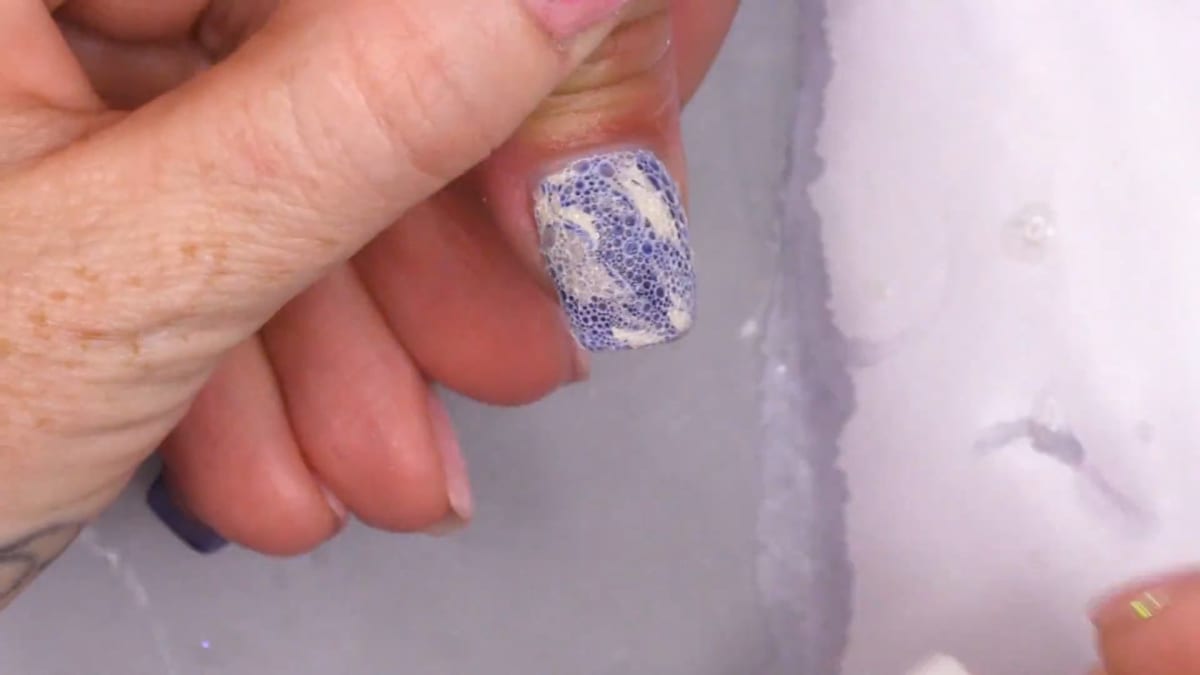
Squeeze the bubble mix onto the marble and fill the nail. Cure for 60 seconds, then wipe over with Gel Residue Wipe Off Solution. The result looks like coral. Watch this step at 15:50
7. Top coat
Apply two coats of top coat on the bubble nails, buffing in between to smooth everything. Watch this step at 16:40
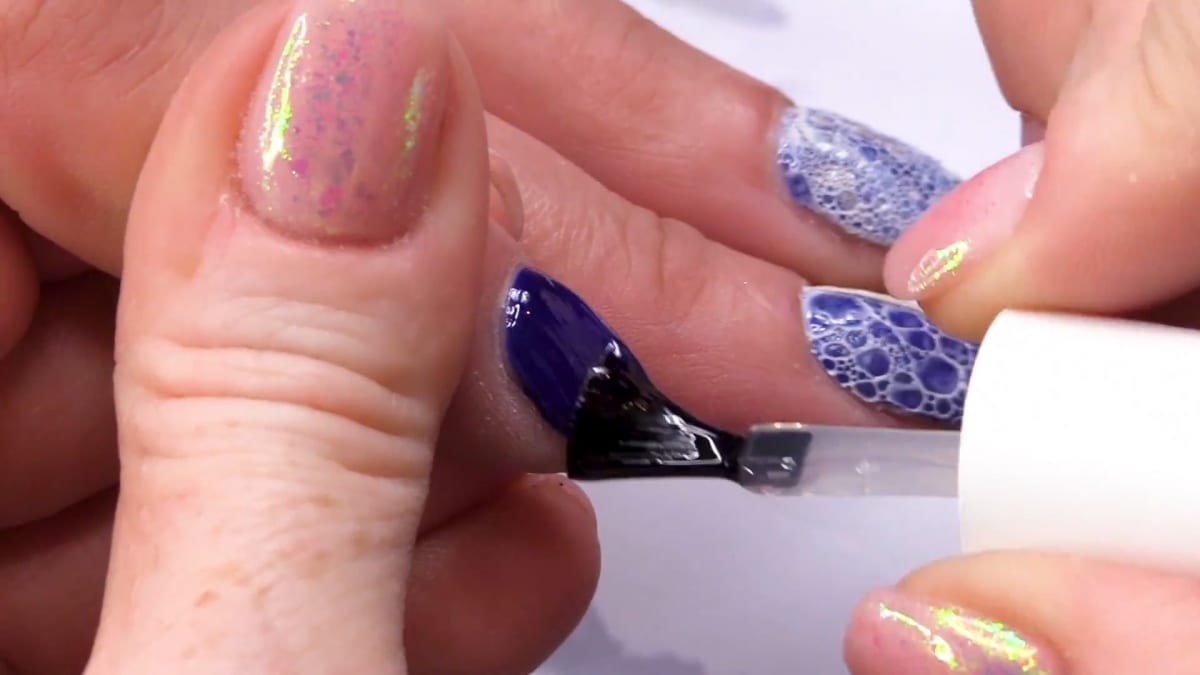
8. Add a foil line
Apply Foil Glue in a line and cure, clean the dull side of the foil with Gel Residue Wipe Off Solution, press it on, rub and pull away. Top coat to seal. Watch this step at 20:00
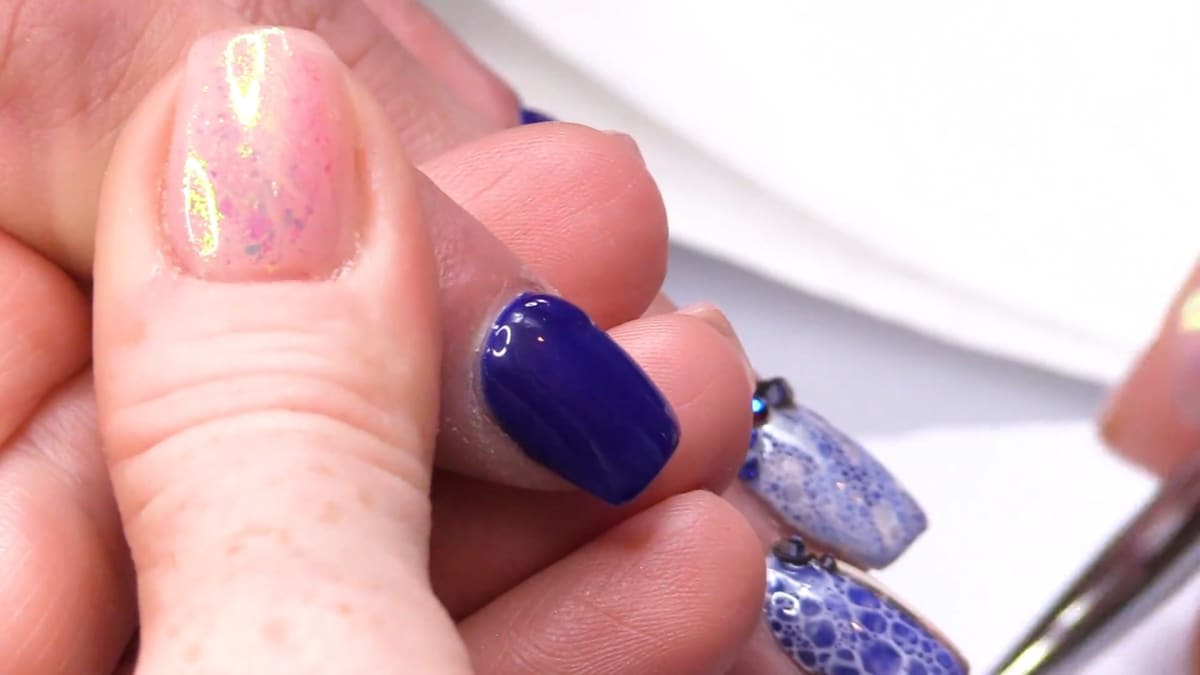
9. Add stones and finish
Place a little Clear as Day on backing paper from a sculpting form and use it to place stones around the cuticle area to frame the nail. Cure, wipe off the sticky layer and finish with cuticle oil. Watch this step at 20:50
Where to find each stage of the Bubble Nails video
| Stage | Time |
|---|---|
| Preparing the nails | 1:30 |
| Base colours | 4:00 |
| Blooming Gel marble | 6:00 |
| Making the bubble mix | 9:30 |
| Ocean Ridge border | 14:40 |
| Applying the bubbles | 15:50 |
| Top coat and buff | 16:40 |
| Foil line | 20:00 |
| Stones and cuticle oil | 20:50 |
Pro Tips
- Keep the Blooming Gel layer thin so the nail does not get bulky.
- You need a colour in the bubble mix as well as top coat, which dilutes it.
- Fill the nail with the bubble mix, as you can add more.
- Buff gently between top coats to keep it smooth.
Who Is This Design For?
This design suits clients with short nails who want something eye-catching, and nail techs who enjoy experimenting with new techniques. It is a short nail design that does not need any length to work.
Ways to Make It Your Own
- Swap the colour palette, for example gold instead of silver
- Use a different base marble
- Skip the foil line
Aftercare
Keep cuticles moisturised with oil daily and avoid using nails as tools.
Frequently Asked Questions
How do you make bubble nails?
Paint Snow White mixed with top coat over the cured design, squeeze on a mix of Gel Residue Wipe Off Solution, water and washing up liquid, cure for 60 seconds, then wipe over to reveal the texture.
What makes the bubbles?
A mix of Gel Residue Wipe Off Solution, water and washing up liquid, with the bubbles pushing the gel into shape.
Why add top coat to the white?
It dilutes the colour so the effect has some transparency.
How long do I cure the bubbles?
Cure for 60 seconds.
Does this work on natural nails?
Yes. It can be done on natural nails or extensions.
Why keep the Blooming Gel thin?
A thick layer makes the nail bulky.
How are the stones placed?
With a little Clear as Day around the cuticle area, then cured.
Give Bubble Nails a Try
Watch the bubble nail technique above, then try it and share your results.


