



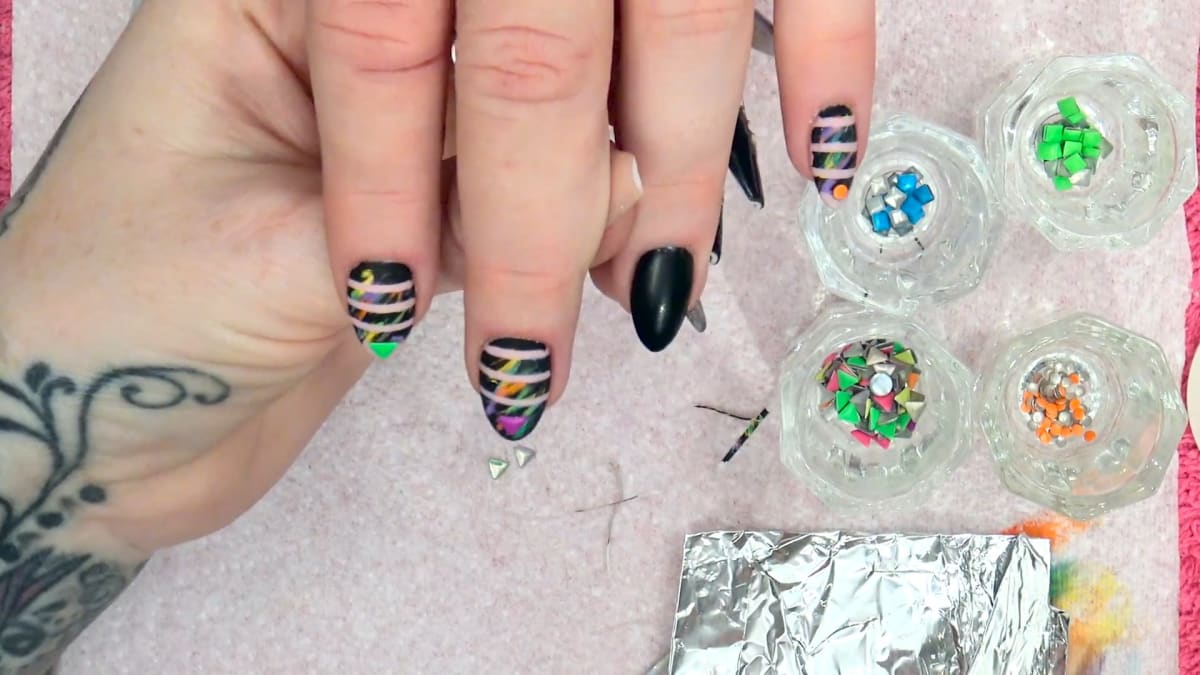
Neon Graffiti Matte Nails combine crisp taped stripes, random splashes of neon colour and black, and a flat matte finish dotted with neon studs. Kirsty Meakin from Naio Nails creates the look on almond shaped acrylic extensions, masking the stripes with striping tape, painting over them, then sealing everything in matte top coat.
It is a really easy matte nail art idea, and a forgiving one: the colour is meant to be random and messy, so there is no pattern to get wrong.
This post covers the taping, the painting, the matte seal and the stud details, including a tiny neon bow on the black nail.
Update: Acrylic paint is not stocked in our store, so the graffiti colours are painted with gel polish (Sherbet Lemon, Azure, Lilac Buds, Shamrock, Snow White and Serious Black) and the Ultra Fine Detail Brush, cured in thin layers. Wherever the video says to dip the brush in water, thin the gel on a palette instead. Baby Cakes stands in for Bambino, and Serious Black for Back to Black. The striping tape is linked to Gold 1mm as the closest match, and the matte top coat to Ultra Matte Top Coat. Orange and the neon studs are listed by name only.
At a Glance
- Design: matte graffiti stripes in random neon colours and black, with neon studs and a stud bow
- Artist: Kirsty Meakin
- Technique: striping tape masking, random painting and a matte seal
- Nail shape: almond acrylic extensions
- Key products: Serious Black, Baby Cakes, Sherbet Lemon, Azure, Lilac Buds, Shamrock and Snow White gel polish, Ultra Fine Detail Brush 0003, Naio Nails Mega Gloss
- Video length: about 10 minutes
Why You'll Love These Neon Graffiti Matte Nails
- Random, messy colour is the point, so it is forgiving.
- Striping tape makes crisp lines.
- Neon studs and a little bow add fun.
- The matte finish gives the whole set a different look from the usual gloss.
How the Taped Stripes Work
Striping tape is a very thin adhesive tape used to mask off lines on a nail. Here it goes on before any colour, pressed right down to the sides of the nail and overlapped slightly so you know it is sealed.
The random colour and black are then painted straight over the top. When the tape is peeled away from the ends, it lifts the colour with it and reveals clean stripes underneath. Doubling the tape gives a thicker line.


Products Used in This Video

How to Create Neon Graffiti Matte Nails
1. Prepare
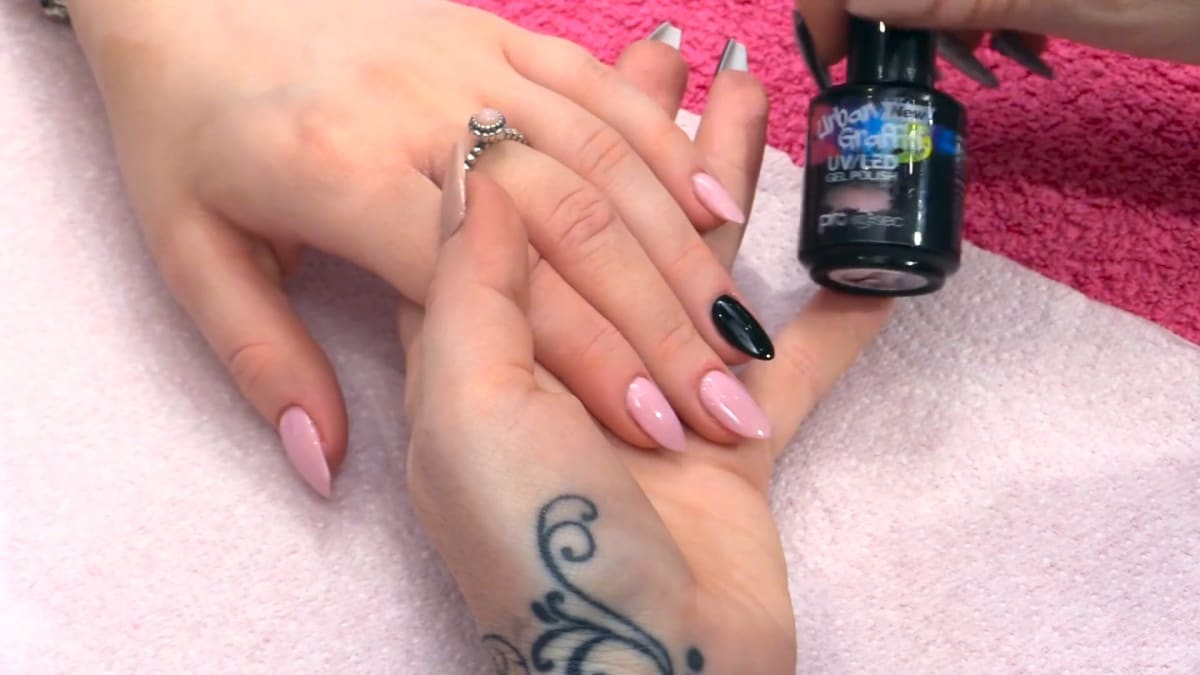
Apply black on the ring finger and the natural nude on the other fingers. Wipe off the sticky layer on all the nails with the Gel Residue Remover. Watch this step at 0:30
2. Tape the stripes
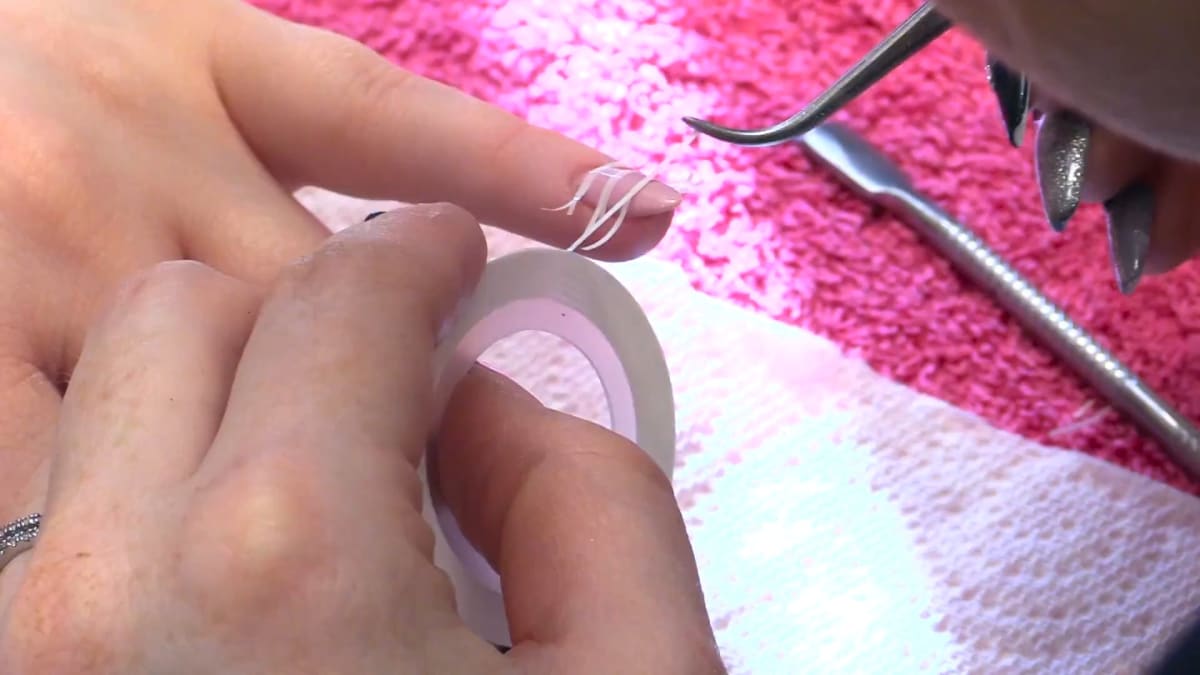
Use striping tape to mask off lines across the nail, sticking it right down to the sides. Double the thickness for a thicker line, overlap slightly so you know it is sealed, smooth it down and snip off any excess carefully. Watch this step at 1:40
3. Paint randomly
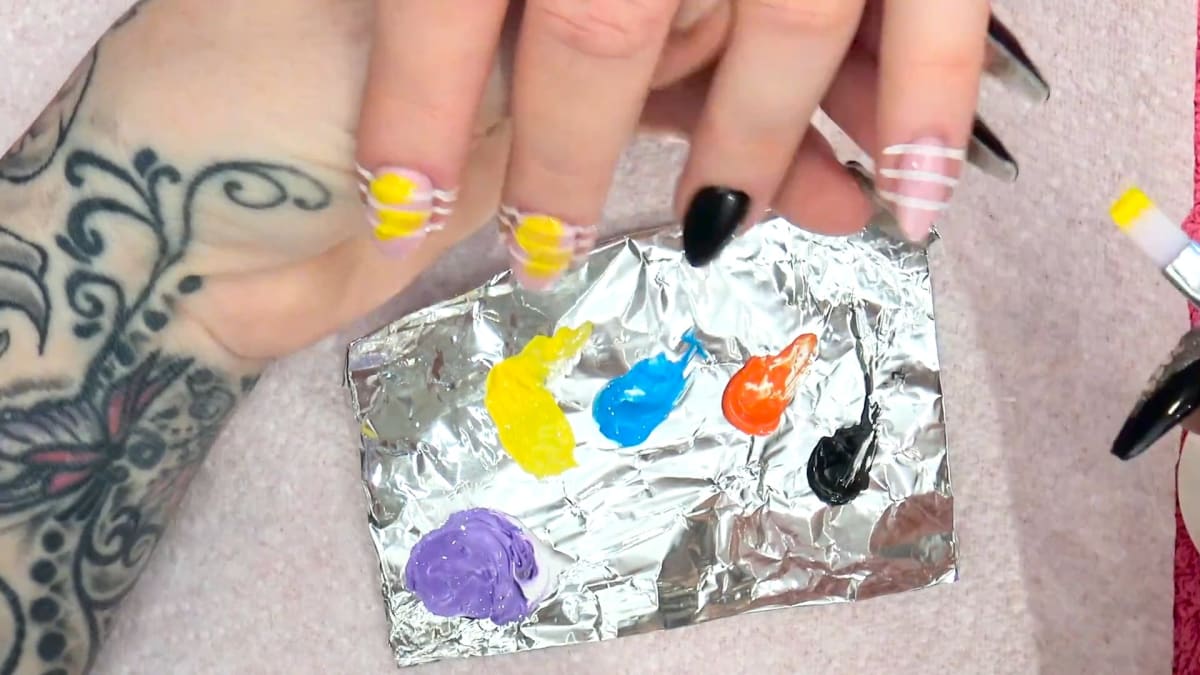
Work on a palette with the yellow, then orange, blue (letting it overlap into some yellow to make green), purple and a little green. Cure thin layers as you go. The more random, the better. Watch this step at 2:50
4. Add black
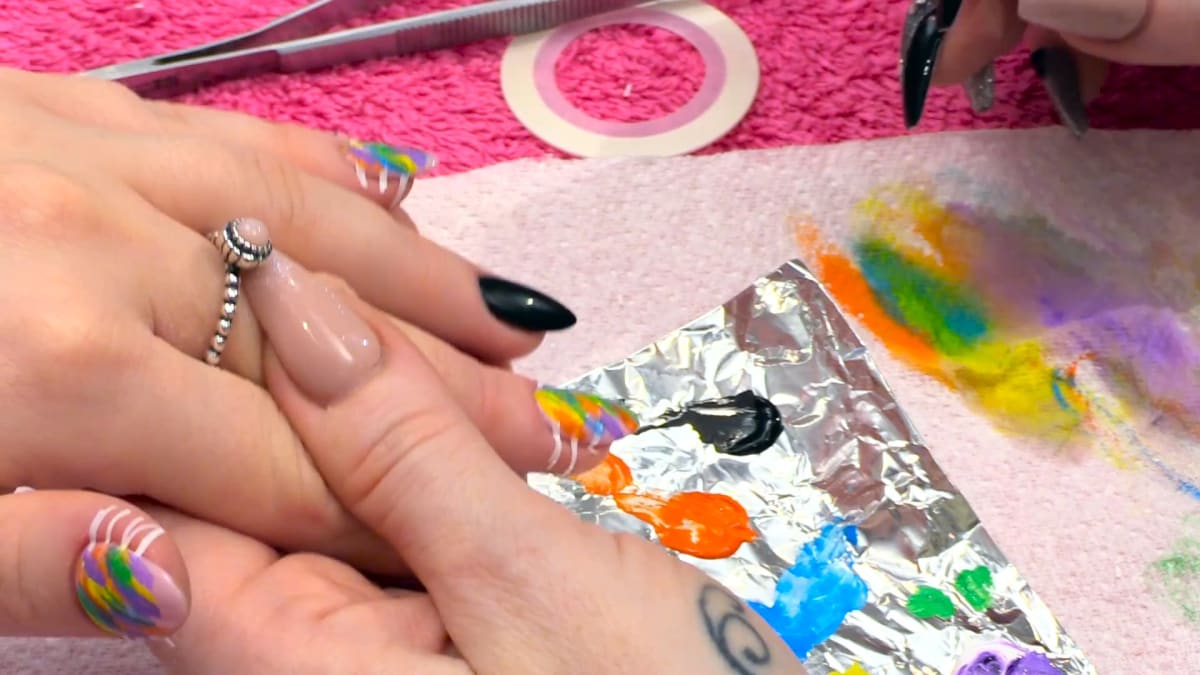
Add black, again at random, and let the brush skip over so some of the neon colour still shows. Keep it neat at the cuticle and round the sides. Cure. Watch this step at 4:00
5. Remove the tape
Check your work, then peel the tape away from the ends to reveal the stripes.
6. Seal in matte
Apply matte gel top coat, covering everything to seal in the design, and cure for one minute. Wipe off the sticky layer to make it even more matte.
7. Add neon studs
Put a little Mega Gloss Sealer Gel where each stud will go, place a triangle stud, then cure. Use a square stud set in a diamond shape on the thumb. Watch this step at 6:20
8. Make the neon bow
On the black nail, clean with the Gel Residue Remover and add Mega Gloss Sealer Gel. Position two orange triangles with a gap between them and a tiny round stud in the middle. Check the position before curing.
9. Seal and finish
Seal over all the embellishments with the matte top coat and cure for a minute. Wipe off the sticky layer. Apply cuticle oil only round the cuticle and side walls, because rubbing it over the nail will make it shiny. Watch this step at 9:00
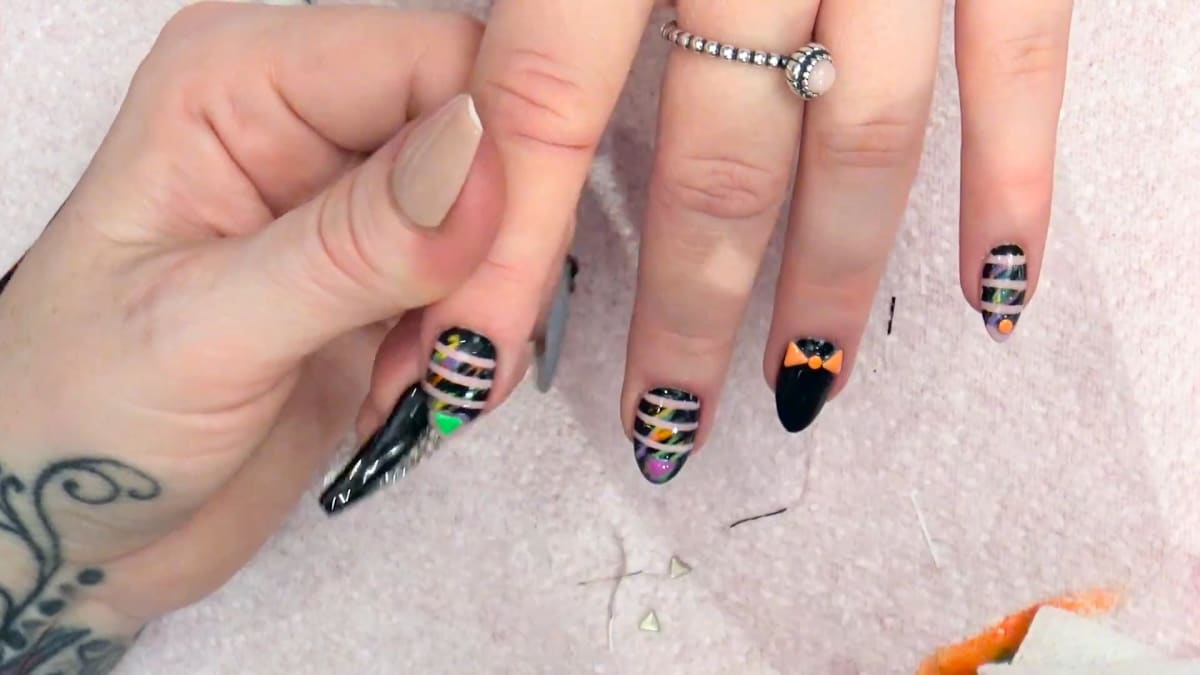
Where to find each stage of the Neon Graffiti Matte Nails video
| Stage | Time |
|---|---|
| Preparing the base | 0:30 |
| Taping the stripes | 1:40 |
| Painting random colour | 2:50 |
| Adding black | 4:00 |
| Adding neon studs | 6:20 |
| The finished set | 9:00 |
Pro Tips
- Stick the tape right down to the sides.
- Check stud positions before curing.
- Seal with Mega Gloss instead of matte if you want a shiny look.
Common Mistakes and How to Fix Them
- Rubbing cuticle oil over the nail. Oil on the nail itself makes the matte finish shiny. Keep it to the cuticle and side walls, and wipe the nail again if it does go shiny.
Who Is This Design For?
Neon Graffiti Matte Nails are for anyone who likes bold, colourful nails and wants a super easy design. Because the painting is random, it is a relaxed way to try striping tape nail art for the first time.
Ways to Make It Your Own
- Choose any colours.
- Seal with gloss instead of matte.
- Use different shaped studs.
Aftercare
To keep your Neon Graffiti Matte Nails matte, apply cuticle oil around the cuticles only and wipe the nail again if it becomes shiny.
Frequently Asked Questions
How do you create Neon Graffiti Matte Nails?
Mask stripes across the nail with striping tape, paint random neon colours and black over the top, peel the tape away, then seal with matte top coat. Neon studs are set in a little sealer gel and sealed in again.
Does the design have to be matte?
No. Seal with Mega Gloss Sealer Gel for a shiny look.
Why overlap the striping tape?
Overlapping slightly lets you know the tape is sealed down.
How do you make a thicker stripe?
Double the thickness of the striping tape.
How do you attach the neon studs?
Put a little Mega Gloss Sealer Gel where each stud will go, place the stud, check the position and cure. Then seal over them with matte top coat.
Why should you not rub cuticle oil over a matte nail?
It will make the matte finish shiny, so apply it only round the cuticle and side walls.
How long do you cure the matte top coat?
Kirsty cures it for one minute, then wipes off the sticky layer to make it even more matte.
Give Neon Graffiti Matte Nails a Try
Neon Graffiti Matte Nails are bright, quick and hard to get wrong. Watch the video above, grab some neon studs and have a go.


