


Abstract portrait nails are made by mapping out wonky faces in black gel polish over a white base, filling each section with a block of bold colour, then repainting a thick black outline over the top. In this tutorial Steffi paints a pair of overlapping faces inspired by Cubism and the work of Pablo Picasso, and finishes them matte.
This Cubism nail art may look daunting, but it's made from basic shapes that you simply colour in. As Steffi says, you can't really go wrong with it.
Below you'll find the products, each step with a link to that point in the video, and Steffi's tips for bold lines and clean colour.
At a Glance
- Design: two wonky, overlapping faces in colour blocks with thick black outlines
- Artist: Steffi
- Technique: hand-painted gel polish, outlined twice in black
- Skill level: suits improving nail artists
- Finish: matte
- Key products: Snow White, Serious Black, Royal Blood, Warm Fire, Teal Appeal, Devil's Shadow, First Night, Oops!, Ultra Matte Coat
- Video length: 16:25
Why You'll Love These Abstract Portrait Nails
- Wonky is the point. Nothing has to be symmetrical or precise.
- Basic shapes. Eyes, noses and lips are simple outlines filled with colour.
- It looks like more effort than it is. The thick final outline pulls everything together.
- Use any colours. Art is subjective, so work with what you have.
Products Used in This Video


What Makes It Cubist?
Cubism is the early twentieth-century art movement, closely linked with Pablo Picasso, that breaks a subject into flat, angular shapes. On a nail, that means a face does not need to be realistic or even symmetrical.
Steffi's version uses two faces that overlap, each drawn deliberately wonky. The design is outlined twice: a first black outline maps where everything goes, and a second, thicker one goes on after the colours and Top Coat so the bold line nail art really stands out.
How to Create Abstract Portrait Nails
1. Paint the white base
On a buffed nail, apply Snow White evenly all over and cure. The white gives the nail opacity so the colours on top really pop. Watch this step at 0:00
2. Map out the first face
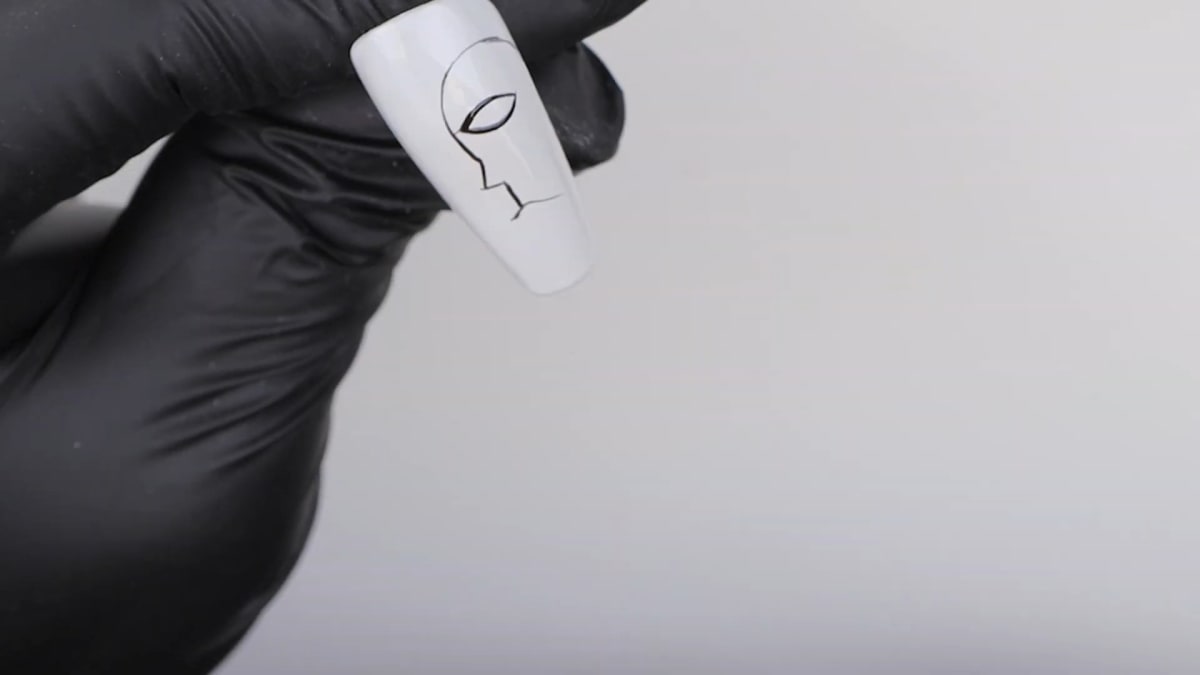
With a 0002 detail brush and Serious Black, paint the shape of an eye, then the nose, and map out the head above in a deliberately wonky way. Add lips in the centre, then the chin, and a few strokes at the side for hair. Watch this step at 2:30
3. Map out the second face
Paint another eye slightly higher up, a wonky nose that looks a little like an upside-down fork, another line, the neck and a semicircle on the cheek. Don't worry about being precise; this stage only marks where the colours will go. Cure fully. Watch this step at 3:20
4. Prepare your colours
Put Royal Blood, Warm Fire, Teal Appeal, Devil's Shadow and First Night on your palette, adding Oops! for the lips. Watch this step at 5:00
5. Fill in the sections
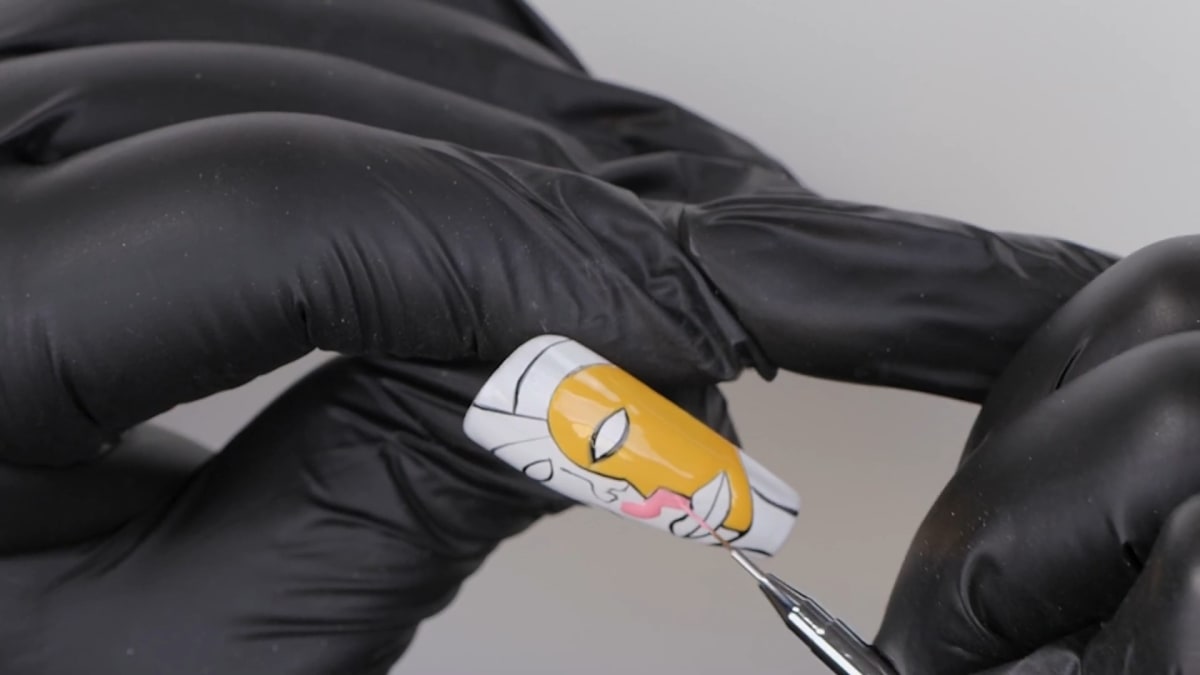
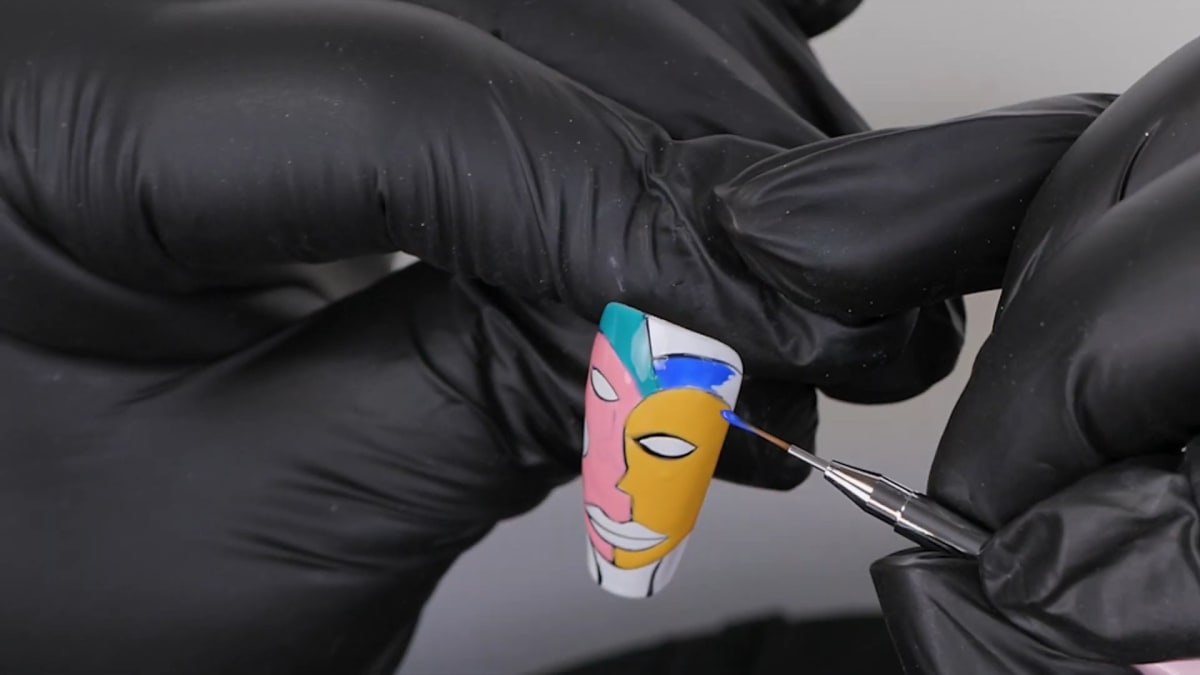
Fill one face with Warm Fire and the other with First Night, then work around the design with Teal Appeal, Royal Blood and Devil's Shadow. Paint carefully along the edges so the wet colours don't touch and mix. Steffi uses two shades for the lips, and fills the eyes with blue and teal. Don't worry if you go over the black lines, as they will be repainted. Cure fully. Watch this step at 6:40
6. Seal with Top Coat
Apply a thin layer of Top Coat all over and cure. This helps the final black outline really stand out. Watch this step at 10:00
7. Paint the final outline
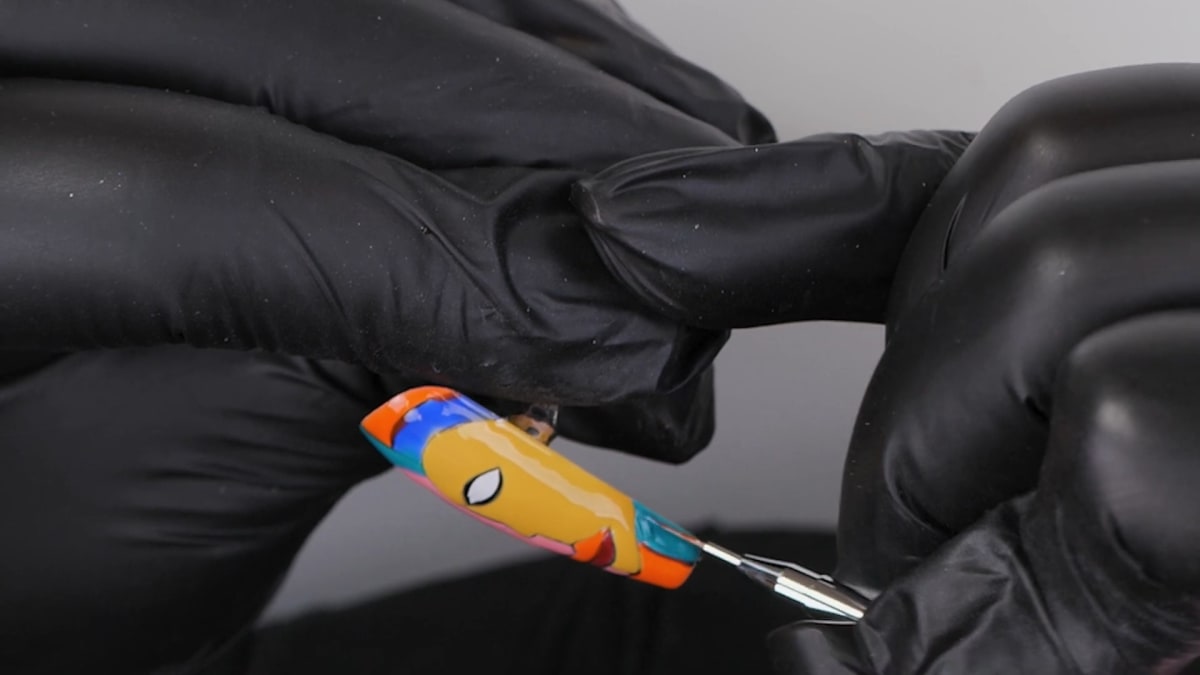
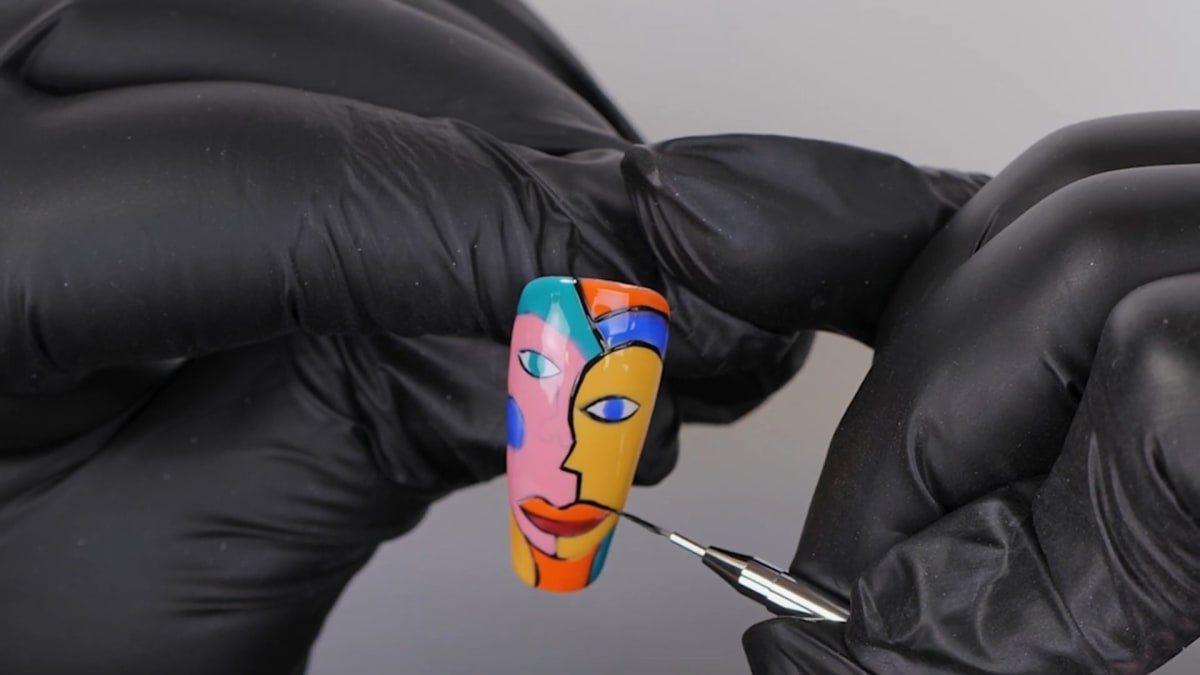
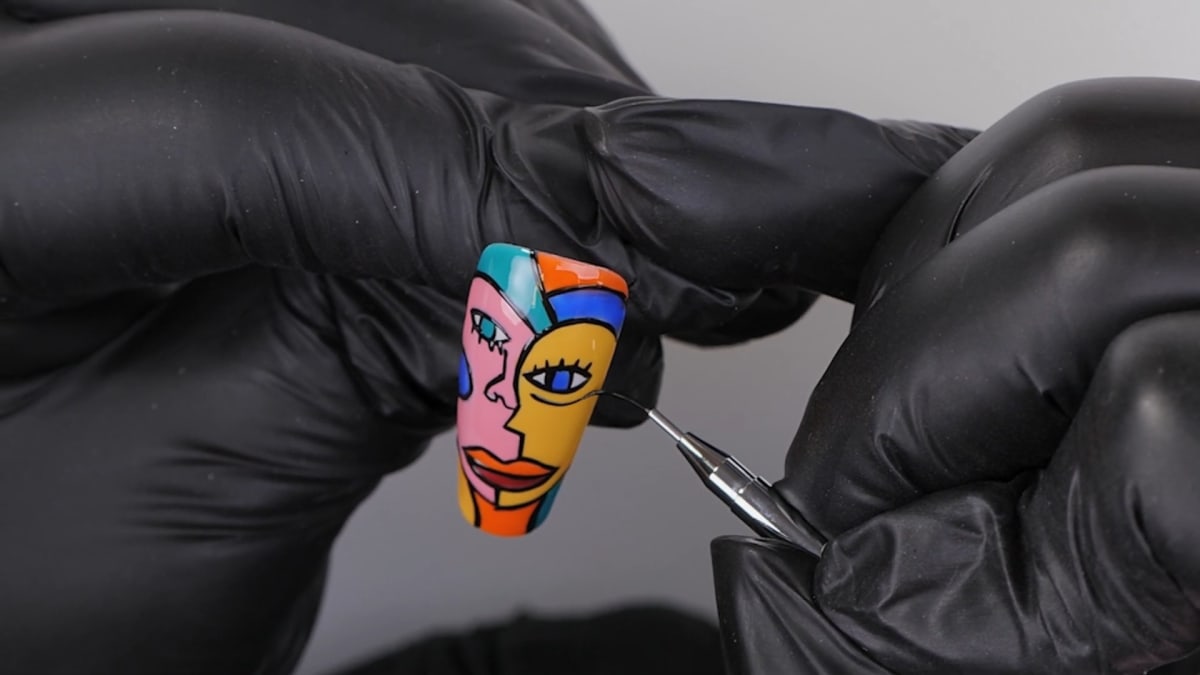
Load your brush with Serious Black and go over all of the lines again, pressing the brush down to get thick, defined lines. Add eyelashes, the chin, the neck and the circle on the cheek. Cure fully. Watch this step at 10:50
8. Wipe and mattify
Wipe the nail with a lint free wipe to remove any residue left from the black, then apply a thin layer of Ultra Matte Coat to seal the design and cure. Watch this step at 14:10
Where to find each stage of the abstract portrait nails video
| Stage | Time |
|---|---|
| Snow White base | 0:00 |
| Mapping out the first face | 2:30 |
| Mapping out the second face | 3:20 |
| Preparing the colours | 5:00 |
| Filling in the colour sections | 6:40 |
| Sealing with Top Coat | 10:00 |
| Final black outline | 10:50 |
| Wiping and matte top coat | 14:10 |
Pro Tips
- Chill your black. Steffi keeps her Serious Black in the fridge so it's slightly thicker for the final outline.
- Separate your colours. Avoid putting the same colour in neighbouring sections, or the art loses its impact.
- Wipe before matte. Matte top coats can sometimes pull pigment from the colour underneath, so remove any residue first.
- Press for thickness. Don't be afraid to press the brush down for bold lines.
Who Is This Design For?
This is a design for art lovers and anyone who wants statement nail art. It suits improving nail artists well, because it relies on confident lines and colour rather than realism.
Ways to Make It Your Own
- Use whatever colours you have available.
- Paint one face per nail across a full set.
- Finish with a glossy Top Coat instead of matte.
- Design your own faces from simple shapes.
Aftercare
Apply cuticle oil daily, wear gloves for cleaning and washing up, and avoid using your nails as tools. Wipe matte nails gently if they pick up any marks.
Frequently Asked Questions
How do you make abstract portrait nails?
Cure a white base, map out two wonky faces in black, and fill each section with a different bold colour. Seal with Top Coat, repaint the outline in thick black lines, then wipe and finish with matte top coat.
Why outline in black twice?
The first outline maps out the design; the second, thicker one goes on after the colours and Top Coat so the black really stands out.
Why start with a white base?
Snow White gives the nail opacity, so the colours painted on top really pop.
Do I need the same colours as Steffi?
No. Feel free to use whatever colours you have and make the design your own.
What if I paint over the black lines when filling in colour?
It doesn't matter. The first lines are only a map, and they are repainted at the end.
How do I get thick black lines?
Load the brush with Serious Black and press it down as you paint. Steffi also keeps her black in the fridge so it is slightly thicker.
Why wipe the nail before the matte top coat?
To remove any residue from the black, because matte top coats can pull pigment from the colour underneath.
What brush is used for abstract portrait nails?
Steffi uses a 0002 detail brush for the mapping, the colour and the final outline.
Give Abstract Portrait Nails a Try
Bold, arty and far easier than they look, abstract portrait nails are a joy to paint. Watch Steffi's full nail art tutorial above and create your own masterpiece.


