



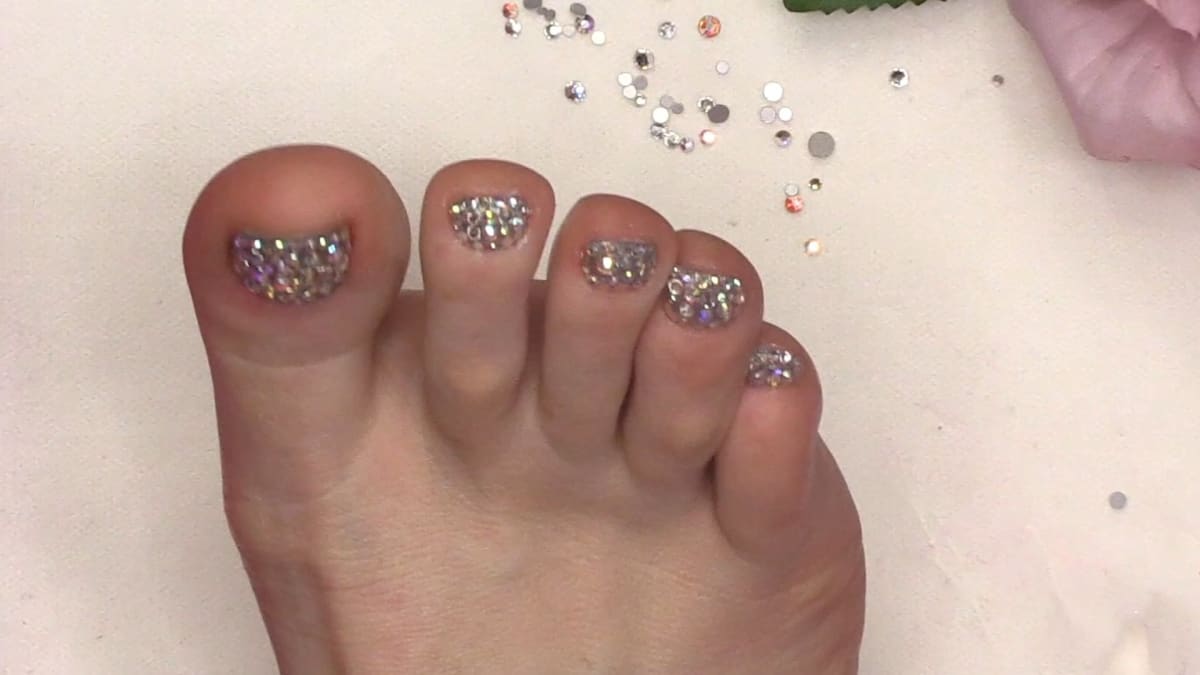
To create full look bling toes, you paint a sparkly background colour, cover each nail in a thin layer of AcryGel and top coat, then press stones in from the cuticle and free edge inwards before curing. In this tutorial Kirsty shows the full look on her own toes.
Bling toes take a crystal pedicure to the next level, with toenails covered in stones from cuticle to tip.
She uses a silver and aurora colour base, AcryGel and a mix of crystal and AB stones. The secret is a colour behind the crystals, so any small gaps between stones still look sparkly. Below you'll find the products, each step with its place in the video, and Kirsty's tips.
At a Glance
- Look: toenails fully covered in crystal and AB stones over silver
- Artist: Kirsty, on her own toes
- Technique: stones set in AcryGel and top coat over gel polish
- Key products: Base Coat, Tarnished Silver, Eclipse, It's Clear Dear AcryGel, Top Coat, AB Crystals - Mixed Sizes
- Video length: about 16 minutes
Why You'll Love These Full Look Bling Toes
- A full crystal look that is guaranteed to get noticed.
- A silver and aurora base adds depth between the stones.
- Long lasting, as Kirsty says the stones stay on for a long time.
- A good way to practise precision on small nails.
Products Used in This Video


How to Create Full Look Bling Toes
1. Prep and base
Wipe the toes with Gel Residue Wipe-off Solution, wipe again if you have touched them, then apply Base Coat. Do the big toe first and cure it. Kirsty says it is important to use a base because it keeps everything on for much longer. Watch this step at 0:30
2. Separate the toes
Make dividers from twirled kitchen paper and place them between the toes, then apply base coat to the rest of the toenails. Watch this step at 1:30
3. Apply the background colours
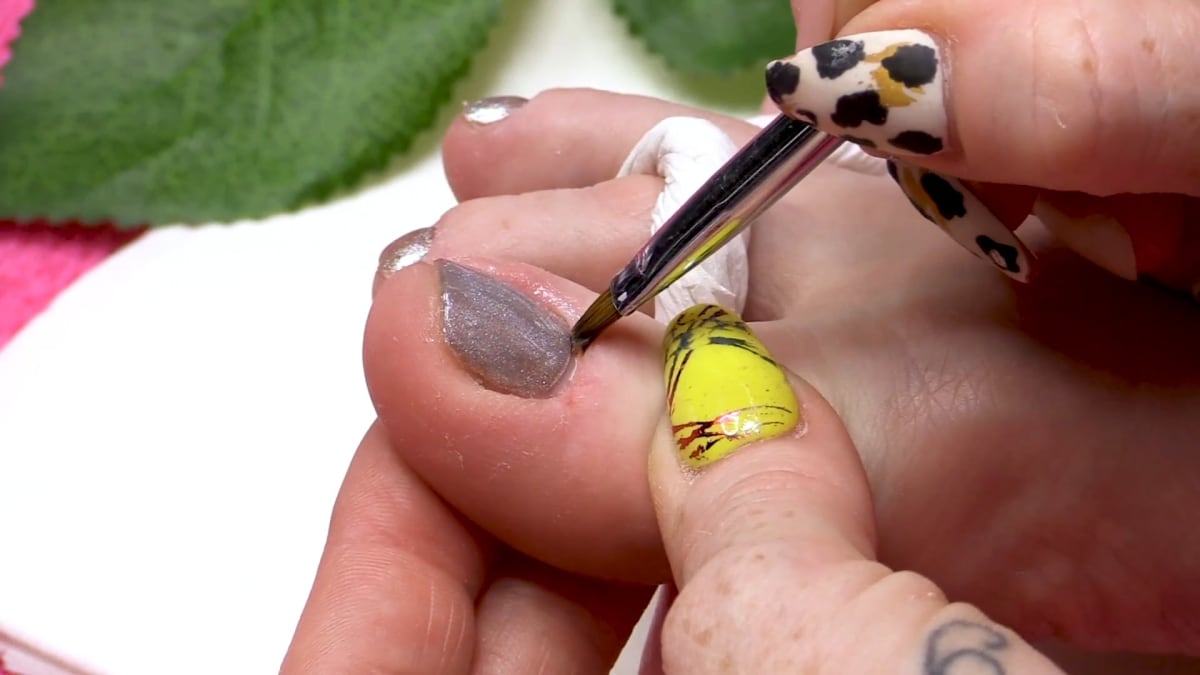
Apply one coat of Tarnished Silver, which is highly pigmented, then a layer of Eclipse over the top for silver with an aurora borealis look. Cure the big toe first if you are worried about knocking it. A colour in the background is important because there will be small gaps between the stones. Watch this step at 5:50
4. Apply the AcryGel
Because the gel polish still has a sticky layer, go straight on with It's Clear Dear AcryGel. Use a brush dipped in Gel Residue Wipe-off Solution to cover the entire nail with a thin coating, edge to edge. Leave a slight gap at the cuticle so the product does not jam into it when the stones are pressed in.
5. Add the top coat
Apply Top Coat slightly beyond where the AcryGel finishes.
6. Place the cuticle and free edge stones
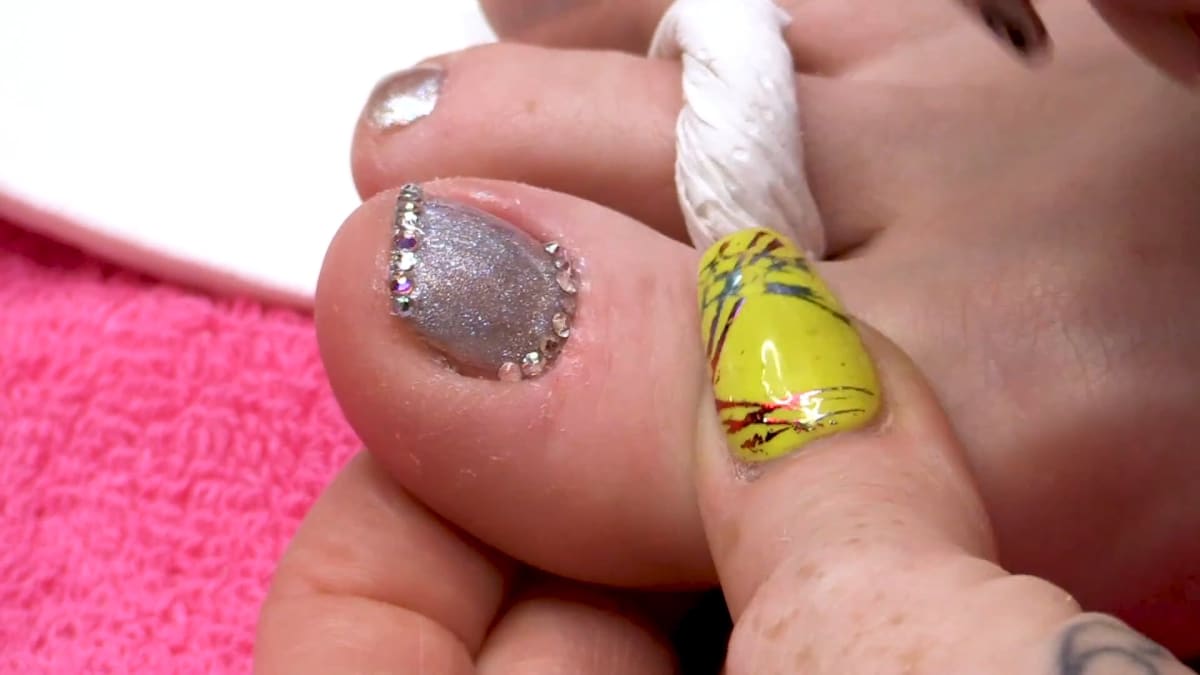
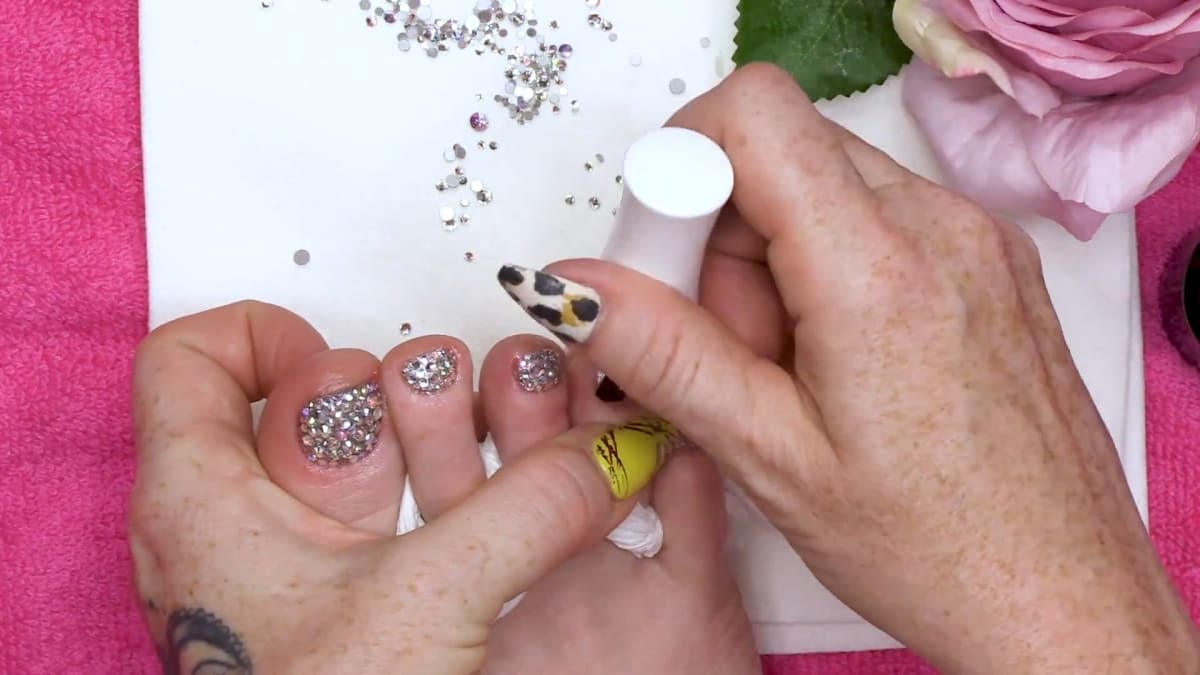
Press small stones into the corners of the cuticle area and around the cuticle, then work along the free edge. These areas need to be super crisp and neat, and no stones should peep over the end of the nail. Watch this step at 7:30
7. Fill in with larger stones
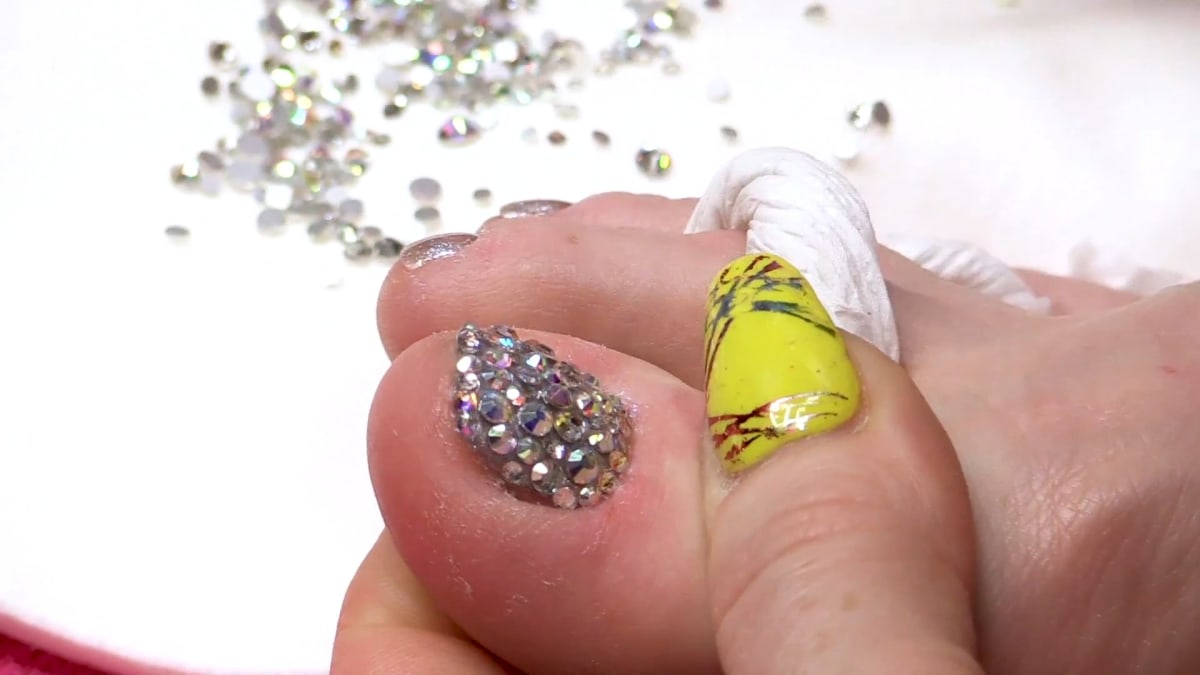
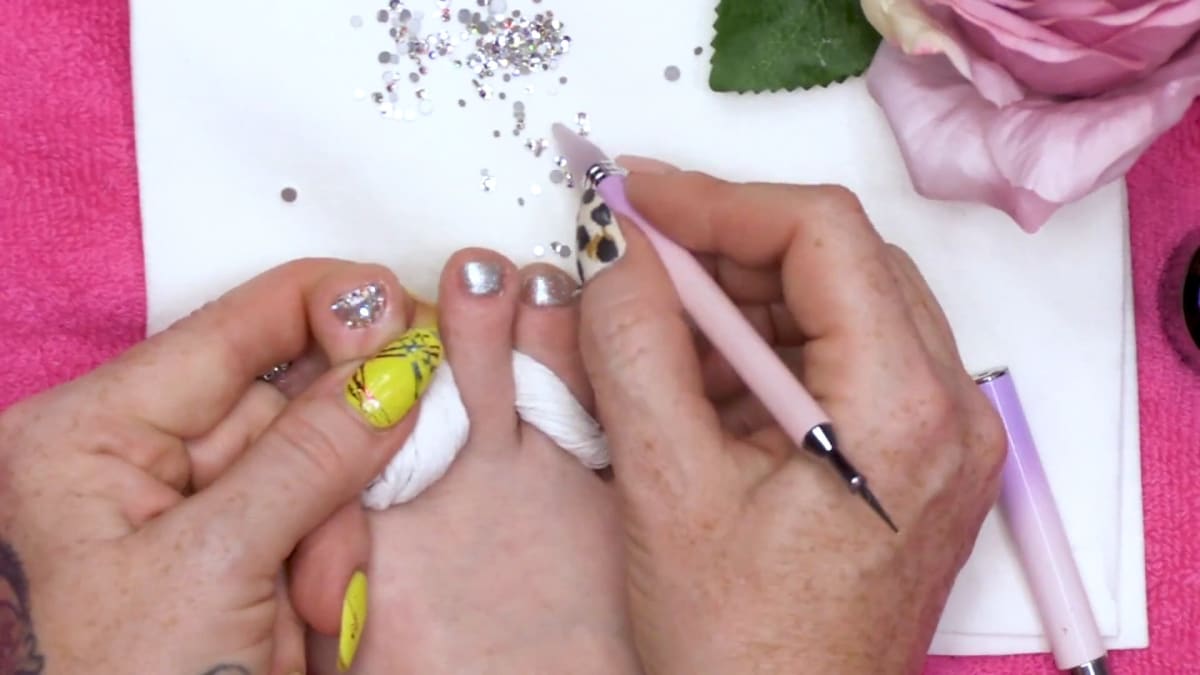
Use a selection of sizes to fill the gaps, a little like a jigsaw. Check every stone is sitting in the AcryGel, then cure. Smaller toes need less AcryGel. Watch this step at 8:20
8. Finish with oil
Apply Cuticle Oil once the toes are finished. Watch this step at 14:30
Where to find each stage of the Full Look Bling Toes video
| Stage | Time |
|---|---|
| Prep and base coat | 0:30 |
| Toe separators | 1:30 |
| Silver and aurora background | 5:50 |
| Cuticle and free edge stones | 7:30 |
| Filling in with larger stones | 8:20 |
| Cuticle oil | 14:30 |
Pro Tips
- Do the cuticle and free edge first for the neatest result.
- Use a mixture of stone sizes to fill gaps.
- Leave a gap at the cuticle so product does not push into the skin.
- Hold the foot carefully so you do not knock the big toe.
- Charge appropriately for the extra time if you are doing this for clients.
Common Mistakes
- Letting stones peep over the free edge instead of keeping it crisp and neat.
- Skipping the background colour, which leaves the gaps between stones looking messy.
Who Is This Design For?
Full bling toes are perfect for holidays, events and anyone who loves a statement pedicure with rhinestone toes.
Ways to Make It Your Own
- Choose a different background colour for a different glow.
- Mix crystal and AB stones for extra sparkle.
- Cover just a few toes if you want a subtler look.
Aftercare
Massage Cuticle Oil into the skin around the nails daily to keep them hydrated.
Frequently Asked Questions
How do you create full look bling toes?
Apply base coat, one coat of Tarnished Silver and a layer of Eclipse, cover the nail in a thin layer of AcryGel and top coat, press stones in from the cuticle and free edge first, fill the gaps, then cure.
Why do I need a colour behind the crystals?
There are slight gaps between stones, and a colour behind them stops the look being messy.
Why leave a gap at the cuticle?
Pressing stones in pushes the AcryGel back towards the cuticle, so the gap stops it jamming up.
Do I need different stone sizes?
Yes, different sizes fill the gaps, like a jigsaw.
Which stones go on first?
The small ones in the cuticle corners and along the free edge, as those areas need to be the neatest.
Do I wipe the sticky layer off before the AcryGel?
No. Kirsty goes straight on with AcryGel over the sticky layer of the gel polish.
Do smaller toes need the same amount of AcryGel?
No. Smaller toes need less.
Give Full Look Bling Toes a Try
Watch the video above and follow along to create your own sparkling toes.


